Follow Me On Social Media!

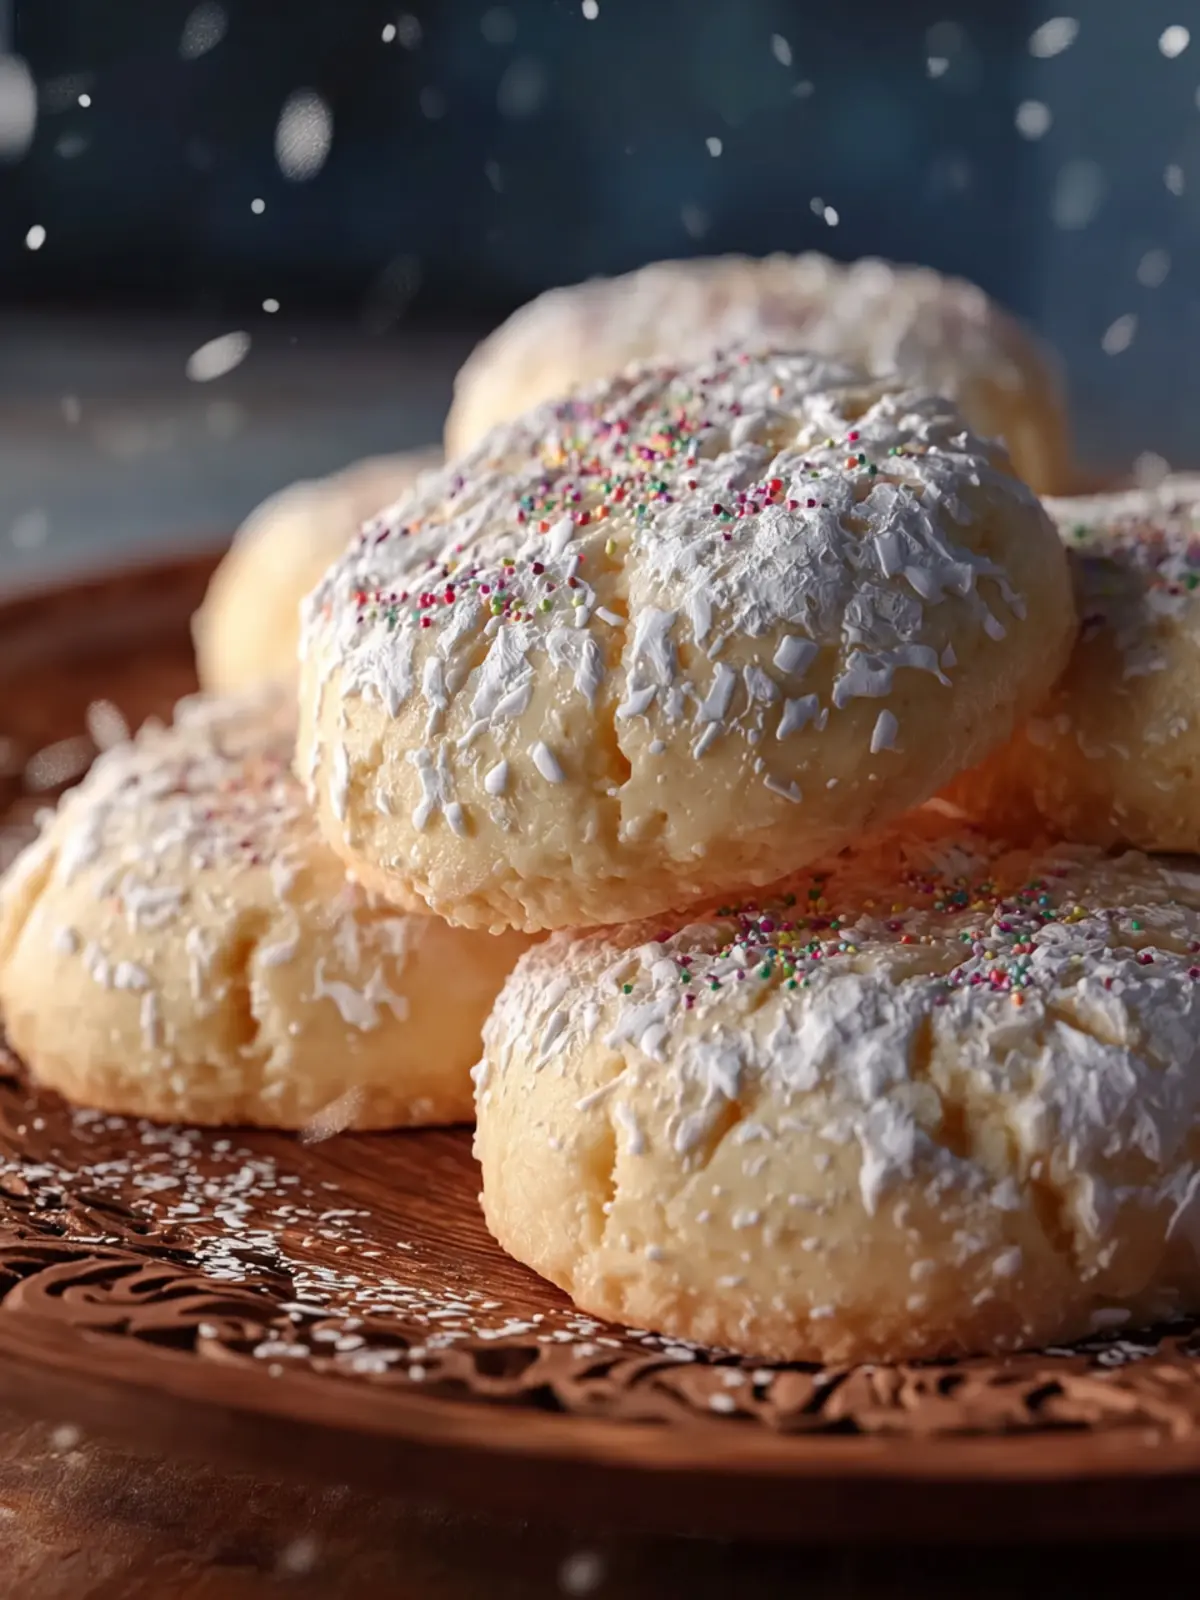
Condensed Milk Snow Cookies: Irresistibly Melty and Sweet
Introduction to Condensed Milk Snow Cookies
Imagine biting into a soft, delightful cookie that melts in your mouth and provides a comforting sweetness reminiscent of home. That’s the magic of condensed milk snow cookies! These treats, with their rich and creamy texture, are the perfect balance of buttery goodness and subtle sweetness, making them truly irresistible. They are a lovely reminder of cozy winter days spent baking with loved ones, and whether you’re hosting a gathering or simply indulging yourself, these cookies are sure to bring a smile to your face.
You might wonder, what sets condensed milk snow cookies apart from your typical cookie? The secret lies in the star ingredient: sweetened condensed milk. Not only does it lend a luxurious creaminess, but it also simplifies the baking process. There’s no need for elaborate creaming methods; simply combine your ingredients for an effortlessly delicious result. Think of it as an invitation to why baking should be enjoyable and stress-free.
What makes Condensed Milk Snow Cookies so special?
These cookies have certain unique features that elevate them beyond the regular offerings:
-
Rich Flavor: The condensed milk not only sweetens but also infuses each cookie with a rich, creamy flavor that elevates the traditional cookie experience.
-
Soft Texture: With very little flour compared to regular recipes, the cookies are delightfully soft and tender, almost cake-like in consistency.
-
Quick and Simple: The straightforward recipe means you can whip up a batch without needing to elaborate on complicated techniques.
-
Versatile Options: While perfect as-is, the cookies can also be varied with additions like chocolate chips, nuts, or dried fruits, allowing for a personal touch tailored to your taste.
What’s more, these cookies store exceptionally well, so you can easily keep a batch on hand for unexpected guests or a last-minute sweet craving. So, gather your ingredients, roll up your sleeves, and get ready for a delicious adventure that’s sure to fill your kitchen with warmth and joy!

Key Ingredients for Condensed Milk Snow Cookies
Baking condensed milk snow cookies combines simplicity with a touch of magic. This delightful treat is all about creating a melt-in-your-mouth experience, and the right ingredients are essential to achieving that.
-
Condensed Milk: The star of the show! Using sweetened condensed milk not only sweetens the batter but also adds an incredible creaminess that ensures these cookies are soft and chewy. This ingredient is your shortcut to rich flavor without extra fuss.
-
Butter: I opt for unsalted butter because it gives me the control to adjust the salt in the recipe. The butter not only enriches the cookies, lending them a luscious taste but also helps obtain that perfect, delicate crumb.
-
Flour: All-purpose flour is what I reach for here. It provides the structure needed for the cookies to hold their lovely shape while still being soft and airy.
-
Powdered Sugar: A sprinkle of powdered sugar transforms these cookies into snowy delights that evoke feelings of nostalgia and warmth. It’s this sweet dusting that makes each bite feel festive and special.
-
Baking Powder: This handy leavening agent ensures your condensed milk snow cookies rise just right, creating that fluffy texture that’s absolutely irresistible.
With just these few ingredients, you’ll be on your way to baking cookies that have both character and charm. Happy baking!
Why You’ll Love These Condensed Milk Snow Cookies
Imagine biting into a soft, melt-in-your-mouth cookie that’s as delightful as a winter wonderland—those are condensed milk snow cookies. Perfect for cozy evenings with friends or as a sweet treat during festive gatherings, these cookies bring warmth and nostalgia to any table.
They are not just any ordinary cookie; they offer a unique twist with the use of condensed milk, making them incredibly moist and tender. The subtle sweetness and creamy texture set them apart from standard sugar cookies, ensuring that each bite is a delightful surprise.
Here’s why you’ll adore making and sharing these cookies:
-
Simplicity: With just a handful of ingredients, condensed milk snow cookies are super easy to whip up. You won’t need any special skills or equipment.
-
Nostalgia: Many of us have fond memories tied to baking with family. This recipe might just start new traditions as you share these cookies with loved ones.
-
Versatility: Customize them easily with your favorite add-ins like chocolate chips, nuts, or even a dash of cinnamon for a hint of warmth.
-
Eye-Catching Presentation: Dusting them with powdered sugar gives these cookies a striking finish, making them perfect for gifting or impressing guests.
As you prepare these cookies, you might find yourself reminiscing about childhood and creating memories that will last a lifetime.

Variations of Condensed Milk Snow Cookies
The magic of condensed milk snow cookies doesn’t just lie in their melt-in-your-mouth texture, but also in their endless potential for customization. Whether you’re hosting a festive gathering or simply indulging in a sweet treat, these cookies can be transformed to suit any occasion.
Flavor Infusions
-
Citrus Zest: Adding lemon or orange zest can brighten up the flavor, offering a refreshing twist that pairs beautifully with the sweet richness of the condensed milk.
-
Extracts: Explore different extracts such as almond, coconut, or even peppermint. A few drops can completely change the profile of your cookies, making them perfect for seasonal celebrations.
Mix-Ins for Texture
-
Nuts: Chopped walnuts, pecans, or even slivered almonds can bring a delightful crunch to your condensed milk snow cookies.
-
Chocolate: From chips to chunks, integrating dark or white chocolate can deepen the flavor and turn these cookies into a decadent dessert.
Toppings & Coatings
-
Powdered Sugar Duster: For a snowy appearance and added sweetness, dusting with powdered sugar right before serving creates a charming visual and taste contrast.
-
Frosting or Glaze: Drizzling a simple icing makes these cookies not only sweeter but also visually appealing, perfect for when you want to impress your guests.
Experimenting with these variations not only allows you to tailor the cookies to your personal taste, but it also makes baking them an exciting culinary adventure. Which variation will you try first?
Cooking Tips and Notes for Condensed Milk Snow Cookies
Creating the perfect condensed milk snow cookies can turn any ordinary day into a delightful treat. These cookies have a unique melt-in-your-mouth texture and a subtle sweetness that captures the essence of comfort food. To help you achieve cookie perfection, here are some tips and notes to enhance your baking experience.
Choosing Your Ingredients Wisely
- Condensed Milk: Opt for sweetened condensed milk for a richer flavor. It’s the heart of these cookies, providing moisture and sweetness that play a key role in the texture. Brands may differ in richness, so choose one you trust.
- Butter: Always use unsalted butter for better control over the saltiness. Room temperature butter is best, as it incorporates more air when creamed, leading to a lighter cookie.
- Flour: All-purpose flour is your go-to for these condensed milk snow cookies. Avoid using cake flour, as it can make the cookies too tender and lose their shape.
Mixing Technique Matters
- Don’t Overmix: When combining your ingredients, mix until just combined. Overmixing can lead to tougher cookies, which is not what we want. You want that delicate crumb that comes from a gentle mixing technique.
- Chill the Dough: Allowing your dough to chill for about 30 minutes can enhance the flavors and improve texture. It helps the cookies retain their shape while baking, preventing them from spreading too much.
Add a Personal Touch
- Flavor Variations: Feel free to experiment by adding nuts or chocolate chips for an extra crunch or richness. You could try adding a touch of vanilla extract or a sprinkle of cinnamon for added depth.
Following these tips will help you create condensed milk snow cookies that are not only delicious but also beautifully presented. Happy baking!

Serving Suggestions for Condensed Milk Snow Cookies
Crafted to melt in your mouth, condensed milk snow cookies are the star of dessert tables and holiday gatherings. Their soft texture and sweet, buttery flavor make them the perfect companion for various beverages. Here are some delightful serving suggestions.
Perfect Pairings
- Coffee or Tea: Enjoy condensed milk snow cookies with your morning brew or afternoon tea. The sweetness of the cookies complements the bitterness of coffee or the subtle notes of herbal tea beautifully.
- Ice Cream: Serve these cookies alongside a scoop of vanilla or chocolate ice cream. The contrast of temperatures and textures can elevate your dessert experience to new heights.
Presentation Ideas
- Holiday Platter: Create a stunning dessert platter featuring your condensed milk snow cookies alongside seasonal fruits, nuts, or even chocolate-dipped fruits. This colorful array will surely impress your guests.
- Gift Jars: Package these cookies in decorative jars tied with a ribbon for a thoughtful homemade gift. Everyone loves receiving delicious treats!
With these serving suggestions, you’ll turn your delicious condensed milk snow cookies into the highlight of any occasion. Enjoy the baking and sharing!
Time Breakdown for Condensed Milk Snow Cookies
Baking condensed milk snow cookies brings a delightful charm to any gathering, and knowing how to manage your time can make it even more enjoyable. Here’s how to break down the timeline for making these delectable bites.
Preparation Time
Getting started with your condensed milk snow cookies takes about 15 minutes. This is when you gather your ingredients, mix them together, and get everything ready for baking.
Chilling Time
For the best texture, let the cookie dough chill in the fridge for 30 minutes. This step is essential for achieving that perfect snow-like softness.
Baking Time
Once you’ve rolled out your dough, baking the cookies will take around 12–15 minutes. Keep an eye on them to ensure they’re just golden enough.
Total Time
All in all, from preparation to the last minute in the oven, expect to spend about 1 hour on your condensed milk snow cookies. Enjoy the sweet aroma as they fill your kitchen!
Nutritional Facts for Condensed Milk Snow Cookies
When indulging in the delightful treat of condensed milk snow cookies, it’s essential to know what makes these tasty morsels tick nutritionally. Here’s a closer look at their key nutritional components.
Calories
Each cookie boasts around 100 calories, making it a sweet bite that can easily fit into your daily intake without breaking the bank on your caloric goals.
Total Carbohydrates
These cookies contain approximately 15 grams of total carbohydrates, primarily derived from the flour and sugars used. They satisfy your sweet craving while providing a small energy boost.
Sugars
With about 8 grams of sugars per cookie, the sweetness of condensed milk shines through, offering a rich flavor that keeps you coming back for more. Just be mindful of portion sizes if you’re watching your sugar intake!
By keeping the cookie experience balanced and tasty, you can enjoy every bite guilt-free!
FAQs about Condensed Milk Snow Cookies
The joy of condensed milk snow cookies fills the kitchen with scrumptious aromas, creating a cozy atmosphere perfect for delightful conversations. It’s only natural to have some questions pop up while whipping up these dreamy treats. Here’s a helpful guide to resolve some common queries.
Can I use dairy-free butter instead of unsalted butter?
Absolutely! If you’re looking to make your condensed milk snow cookies dairy-free, many brands offer excellent dairy-free butter substitutes. Just ensure it’s a spreadable variety, as this will help provide the desired texture and flavor in your cookies. Popular options include coconut oil, vegan butters, or even nut-based spreads. You may want to tweak the measuring slightly since some alternatives can have different moisture content.
What can I substitute for sweetened condensed milk?
If you find yourself without sweetened condensed milk, fear not! A homemade alternative combines whole milk with sugar; simmer equal parts until slightly thickened to mimic the original texture. Alternatively, you can opt for coconut cream mixed with sugar for a dairy-free version. While the flavor may vary slightly, your cookies will still be deliciously delightful!
How can I store leftover cookies?
Storing leftover condensed milk snow cookies is simple! Allow them to cool completely, then place them in an airtight container. They can last for up to a week at room temperature, keeping their sweetness intact. For longer storage, consider freezing them—just layer parchment paper between cookies to prevent sticking. Thaw them on the counter when you’re ready to enjoy them again!
Conclusion on Condensed Milk Snow Cookies
In summary, condensed milk snow cookies are a delightful treat that brings warmth and joy to any gathering. These cookies offer a unique twist on traditional recipes, showcasing the creamy sweetness of condensed milk while still capturing that classic, melt-in-your-mouth texture. Picture a winter afternoon spent baking these treats; the aroma wafting through the kitchen can transform even the gloomiest day into something special.
Whether you enjoy them with a cup of coffee or share them with friends, these cookies are sure to create lasting memories. So, roll up your sleeves and indulge your sweet tooth with this delightful recipe—your kitchen deserves a little sweetness!
Print
Delicious Cookies
- Total Time: 57 minutes
- Yield: 24 cookies 1x
- Diet: Vegetarian
Description
These cookies are easy to make and perfect for any occasion!
Ingredients
Scale
- 1 cup unsalted butter, softened
- ½ cup sweetened condensed milk
- ½ cup powdered sugar
- 1 teaspoon vanilla extract
- 2 cups all-purpose flour
- ¼ teaspoon salt
- Powdered sugar (for dusting)
Instructions
- Beat the unsalted butter in a large bowl until smooth and creamy.
- Add the sweetened condensed milk, powdered sugar, and vanilla extract; mix until light and fluffy.
- Gradually add the flour and salt, mixing just until combined.
- Roll the dough into 1-inch balls and place them on a parchment-lined baking sheet.
- Refrigerate the balls for about 30 minutes.
- Preheat the oven to 350°F (175°C).
- Bake the cookies for 10-12 minutes, until edges are lightly golden.
- Remove from the oven and let cool slightly, then roll warm cookies in powdered sugar.
- Let cool completely and dust with an extra layer of powdered sugar before serving.
Notes
- Chilling the dough helps to prevent the cookies from spreading too much.
- Adjust baking time for desired softness or crispness.
- Prep Time: 15 minutes
- Cook Time: 12 minutes
- Category: Dessert
- Method: Baking
- Cuisine: American
Nutrition
- Serving Size: 1 cookie
- Calories: 120
- Sugar: 10g
- Sodium: 50mg
- Fat: 6g
- Saturated Fat: 4g
- Unsaturated Fat: 2g
- Trans Fat: 0g
- Carbohydrates: 15g
- Fiber: 0g
- Protein: 1g
- Cholesterol: 30mg